
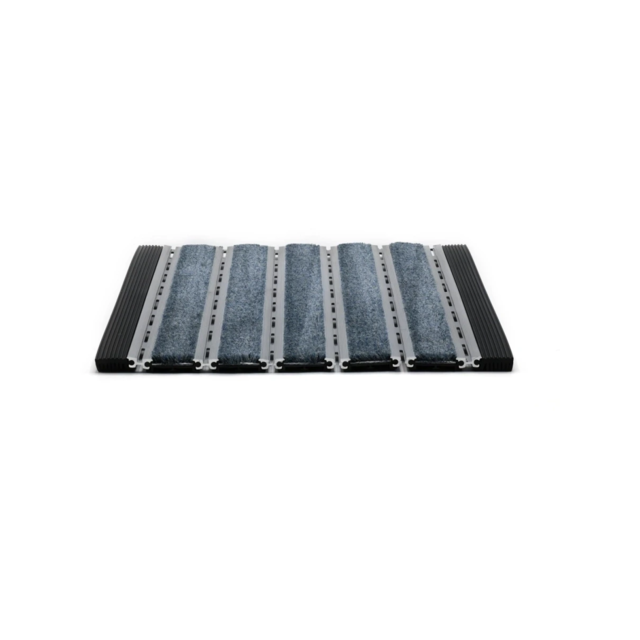
Submittals for wall protection and entrance grilles are rarely the most exciting part of a job, but they decide whether the product arrives on time, in the right colour and at the right size. A clean package moves through review in one pass. A thin one bounces back, and every round costs weeks that the schedule usually does not have. Here is what a complete submittal looks like for Section 10 26 00 wall and door protection and Section 12 48 13 entrance mats and grilles, and what to expect from the installer at each stage.
What the spec usually asks for
Part 1 of most wall protection and entrance grille sections lists the required submittals. Wording varies, but a typical package includes:
- Product data – manufacturer’s current technical data for each product, including preparation and installation recommendations.
- Shop drawings – locations of each item, profiles, heights, mounting and anchorage details, and for grilles, plan layouts, frame sections and recess depths.
- Selection samples – colour charts or chips showing the available range, so the consultant can make selections.
- Verification samples – short lengths of the actual selected product, often with an end cap, or a grille section with the specified tread insert.
- Test reports or certifications – fire performance, impact resistance or indoor air quality, where the spec calls for them.
- Installation instructions – the manufacturer’s current instructions.
- Warranty – a sample of the manufacturer’s warranty and any installer warranty.
- Maintenance data – cleaning and care instructions for the O&M manual.
Always submit in the format the PM or consultant asks for, whether that is a single bookmarked PDF, a submittal portal or separate packages per spec section. It sounds minor, but a package that is hard to review tends to be reviewed last.
How C/S and Inpro support the package
The major manufacturers make much of this easier than it used to be. Construction Specialties publishes specifications, CAD details and a Revit/BIM library, and offers an online Submittal Builder for assembling product data into a submittal. Its entrance flooring pages note that the BIM and CAD files are frame-specific and show the overall recess depth each frame needs.
Inpro’s Specs + Tech Docs library can be filtered by product and document type, and includes technical data, specifications, installation instructions, BIM/Revit files, cleaning instructions, warranties and environmental documents such as EPDs and HPDs. Both manufacturers also supply physical colour samples on request.
These resources are a starting point, not a finished submittal. The installer still needs to tie the generic data to the project: marking up which profiles, colours and options apply, and drawing the actual locations and conditions.
Shop drawings: where the real work is
Good shop drawings answer the questions the site will ask later. For wall protection, that means:
- Plans or elevations showing every crash rail, handrail, corner guard and sheet panel by type
- Mounting heights, terminations, end caps, inside and outside corners, and splice locations
- Backing and blocking requirements, clearly noted for the framing trade
- Door frame protection by opening, coordinated with the hardware schedule
For entrance grilles, the drawings should show the grille layout, tread direction, frame type, recess depth and any drainage, plus how the grille meets adjacent finishes and door thresholds. Recess depth is the detail most likely to cause problems, because the slab is often poured long before the grille is ordered.
Timing: submittals versus lead times
Lead times for custom grilles and coloured wall protection vary by manufacturer, product and season, so the safest assumption is that fabrication cannot start until submittals are approved and colours are selected. Working backwards from the install date, the sequence usually looks like this:
- Submit product data and selection samples early, so colours are chosen before shop drawings are finalized
- Submit shop drawings once dimensions are reasonably firm
- Field-verify, then release to fabrication
- Allow manufacturing and shipping time, confirmed with the supplier for that specific order
When the schedule is tight, splitting the package helps: get colours approved first, then follow with shop drawings. Ask the manufacturer for a current lead time at the point of order rather than relying on last year’s numbers.
Field verification before release
Approved shop drawings are not a licence to fabricate. Before releasing an order, the installer should go to site and check the actual conditions against the drawings:
- Mat wells and grille recesses – length, width, depth, squareness and level, plus any out-of-square corners or slab irregularities
- Wall conditions – finished wall locations, corner angles, door frame profiles and whether backing is actually in place
- Interfaces – door swings, thresholds, flooring transitions and nearby services
For custom-shaped entrance units, Construction Specialties offers a template kit and a fee-based template preparation service, where a CS technician measures and creates a digital template of each area. Whichever route is used, accurate site dimensions before fabrication are what make the grille fit.
On the York University Markham Campus project in 2024, GRIT installed seven stainless foot grilles and a perimeter trench cover. On work like that, verifying each recess on site before release is what gets units sitting flush with the finished floor at every entrance.
Closeout: finishing the job properly
A complete closeout package makes life easier for the GC and for the facility team who will maintain the product for years. It should include:
- Manufacturer and installer warranties, with start dates
- O&M data, including the manufacturer’s cleaning and maintenance instructions
- As-built locations where they differ from the shop drawings
- Attic stock, labelled and turned over as the spec requires, with a signed receipt
- Photo documentation of the completed installation
What a good installer delivers
In short, a good wall protection or entrance grille installer should take submittals off the GC’s plate, not add to them. That means a package that is complete on first submission, shop drawings that reflect real site conditions, field verification before anything is fabricated, and a closeout binder that is ready when the PM asks for it. That is how GRIT works: shop drawings, product data and samples in the format the PM or consultant requires, field verification of mat wells and wall conditions before release, and a closeout package with warranties, O&M manuals, attic stock and photos.
Talk to GRIT about your next package
GRIT Construction Services supplies and installs C/S Pedimat and other entrance grille systems, GritLine deep pit grilles, stainless trench covers and Acrovyn wall and corner protection across the GTA. We carry $5M CGL insurance and WSIB clearance, and typically quote within 48 hours of receiving drawings.
Learn more about our entrance grilles and wall and corner protection work, or contact us with your spec and drawings. Call (647) 382-8256 or email info@gritcon.ca.
Sources: Construction Specialties – Entrance Flooring FAQs; Inpro – Specs + Tech Docs; Inpro Section 10 26 23.13 guide spec (ARCAT); UFGS 10 26 00 Wall and Door Protection (WBDG).